| Home | Networking | Remote Access | Software | Security | Services | Support | ||||||||||||||||||||||
 |
|||||||||||||||||||||||||||||||||||||||||||||||||||||||||||||||||||||||||||||||||||||||||||||||||||||||||||||||||||||
|
|||||||||||||||||||||||||||||||||||||||||||||||||||||||||||||||||||||||||||||||||||||||||||||||||||||||||||||||||||||
|
|
||||
| Configuring Windows 95 and 98 for Ethernet Use The following are instructions for configuring Windows 95 or 98 to work with ethernet at Stanford University. To follow these instructions you should already have a Leland account, an ethernet card, and Windows 95 or 98 installed on your computer. |
||||
|
|
||||
| Configuring the Ethernet Card for Windows 95/98 | ||||
|
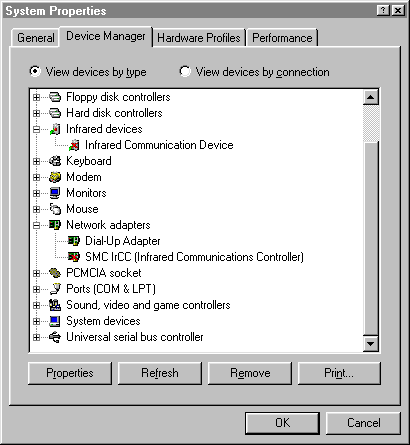
To see if Windows 95/98 has recognized your ethernet card you can open the "Device Manager" (Select "Start" Menu -> Settings -> Control Panel -> System -> Device Manager) and check to see if you ethernet card is listed under "Network Adapters". |
||||
 |
||||
| Press the "+" to the left of the "Network Adapters" to display the network adapters installed. In the example above, there are two network adapters installed: "Dial-Up Adapter" and "SMC IrCC".
Note that neither one is an ethernet adapter. The most common ethernet adapters on campus are the "3Com Etherlink III" series adapters. |
||||
| If your ethernet card is not listed, then you will need to tell Windows 95 to look for your ethernet card. Go to the "Control Panel" folder inside "My Computer" and double-click "Add New Hardware". A series of dialogs will pop up to guide you through the process of adding the ethernet card. You should allow Windows 95 to automatically detect your new hardware if it offers to do so. |
||||
| Add the TCP/IP Protocol to the Network Control Panel | ||||
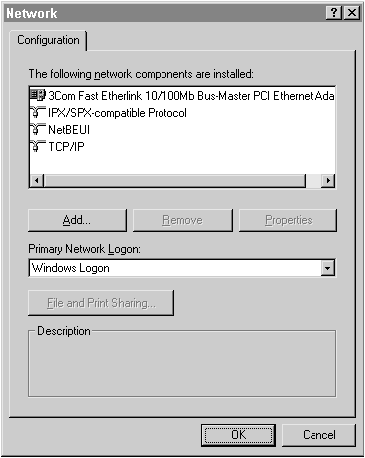
Once you've gotten Windows to recognize your ethernet card, you need to install Windows 95/98's built-in support for the TCP/IP protocol. Go to the "Control Panel" folder and double-click the icon titled "Network". You may skip to the next step Connect the Ethernet Cables if in the "Configuration" tab of the "Network" control panel, you see a component titled "TCP/IP" and a component named after your ethernet device card ("3Com EtherLink III ISA...", for example). All other the other components are optional. In fact, ITSS recommend you delete "Client for Netware Networks", "IPX/SPX-Compatible Protocol", and "NetBEUI" unless you are going to use these protocols. This will increase memory and reduce network traffic. |
||||
 |
||||
| To add TCP/IP, click on the "Add" button. | ||||
 |
||||
| In the "Select Network Component Type" dialog box, select "Protocol" and click on the "Add" button: | ||||
 |
||||
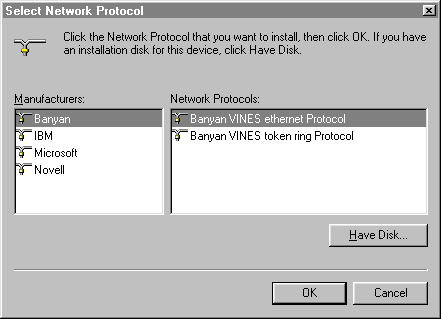
| Select "Microsoft" from the list of manufacturers on the left, and select "TCP/IP" from the list on the right and click the "OK" button. You may be asked to insert your original Windows 95 CD and to restart your computer.
Once you have restarted your computer and installed both your network ethernet adapter and the TCP/IP protocol you can continue with the next step, connecting your computer to an ethernet port. |
||||
|
|
||||
| Getting Additional Help | ||||
Almost all of the computers being purchased at Stanford today are preinstalled and preconfigured with ethernet cards. For additional help, contact your department's Local Network Administrator (LNA). |
||||
|
Last Updated: Wednesday, March 17, 1999 |
||||